How Do You Blog Consistently When You Have Very Little Time?

From ProBlogger Expert Ali Luke of Aliventures.
Do you ever feel like your blog is yet another responsibility on a very long list?
For the vast majority of bloggers, blogging has to fit in around an already full life. Perhaps you’re:
- Building an online business, which you’re marketing by blogging … but the business takes up loads of time
- Starting out as a freelancer writer, and building a client list through your blog and newsletter … but you need to focus most of your working hours on your paid writing
- Raising a young family – with sleepless nights, hectic mornings, and tons of housework along the way
- Working long hours at a busy day job … leaving you very little time or energy to write
Even if you have very little time, you can blog consistently. Here’s how:
Step #1: Remember That Consistent Blogging Doesn’t Mean Frequent Blogging
Perhaps, right now, you can’t realistically commit to publishing posts on a frequent basis.
That’s fine.
You don’t necessarily need to blog weekly (and you definitely don’t need to blog daily). I’ve never met a reader who unsubscribed because a blog didn’t publish quite as much great content as they’d have liked; I’ve met plenty who unsubscribed because they felt overwhelmed by the volume of content … or who left because the quality dropped.
I suggest blogging between once a month and once a week: decide on the frequency and do your best to stick with it.
If you can, write a post or two to keep back for times when you’re particularly busy. If you haven’t been posting for a while, delay starting back until you’ve built up a little stock of posts.
Step #2: Batch Together Your Blogging Tasks
When you’ve only got, say, an hour a week, you don’t want to waste your time struggling to come up with an idea.
I’ve been blogging for nine years now (on my own blogs and as a guest poster and freelancer), and over time, I’ve learned that it’s easiest to batch together different content creation tasks.
Batching can be a huge help with managing your energy as well as your time – take a look at Naomi Dunford’s great post How To Stay Amazingly Productive On Low Energy Days for examples of how different blogging activities might fit your “ebb” or “flow” times.
Here’s how I suggest you batch your tasks:
Ideas
Set aside 20 minutes. Come up with as many ideas as you can (try to get at least 10). They don’t have to be amazing ideas! Get lots down as quickly as possible and you’ll soon find that you move beyond the unworkable or boring ones.
If you’re stuck, try using the ProBlogger blogging prompts to spark off ideas: you can get a whole pack of them when you join the ProBlogger weekly newsletter (which is also a great source of blogging inspiration)!
Planning
Set aside another 20 minutes. Pick four ideas. Spend no more than five minutes very briefly planning for each one.
It helps to come up with a consistent structure (which I’ll get to later in this post). For a very basic structure, think:
- Introduction
- Several key points that all relate closely to your idea/ title
- Conclusion
Outlining
You might be happy to write straight from your five minute plan (especially if your post is a short one). If you want, though, you can add an extra “outlining” stage into the batching process.
Go through your 5 minute plan and flesh out each key point. Add notes about:
- What specific tips or ideas you want to share in each section.
- Any links or examples you want to use.
I’d suggest spending 10 minutes per outline at this stage.
It’s absolutely fine to change things about your plan at this point, too – don’t feel that you have to stick 100% to what you’ve already written.
Drafting
Once you’ve got an outline, drafting your post is pretty straightforward! It’s just a matter of going through and writing out each section that you’ve planned. You won’t need to worry about where you’re going next, and you won’t find yourself going off on a long tangent.
You also don’t need to draft your post in a single session. You’re not trying to store it all in your head – your outline is down on paper already – so you can draft in short bursts (e.g. 10 – 20 minutes per day) if that suits your schedule better.
Rewriting
If you created a good outline before you drafted your post, you may well not need this stage! If you didn’t, you may have found that your first draft went off in an unexpected direction or that your initial idea needed some refining as you wrote.
If that’s the case, set your post aside for a day or two, so you can come back to it with fresh eyes. Then:
CUT: Cut out any sections that don’t really fit the post. Save them for a different piece.
REARRANGE: See whether any sections (or even paragraphs) would read more smoothly or logically if you reordered them.
ADD: Check whether there’s anything you need to add. This might be simply a link to another post or an explanation of something that new readers may not understand.
Editing
When you edit, you’re looking very closely at your post: at the sentence structures and word choices. (This is why you want to rewrite first, if your post needs a fair amount of work: there’s no point perfecting a sentence that you’re only going to end up cutting out altogether.)
You may find that it’s helpful to have a batch of 2 – 4 drafts ready that you can edit in sequence, with your critical “editing” hat on rather than your creative “writing” hat in place.
Formatting and Links
If you’ve not already done it when editing, go through your post one last time and make it look great.
Put in an image (or several images), Header 2 format for subheadings, bold text for key points, blockquote format for quotes, bullet points for lists, and so on.
Also look out for any opportunities to include a useful link – whether that’s to an old post on your blog or a post on someone else’s site.
Step #3: Use a Content Calendar
If you sometimes struggle to know what to post, or feel like your blog needs more variety or consistency, you need a content calendar or editorial calendar.
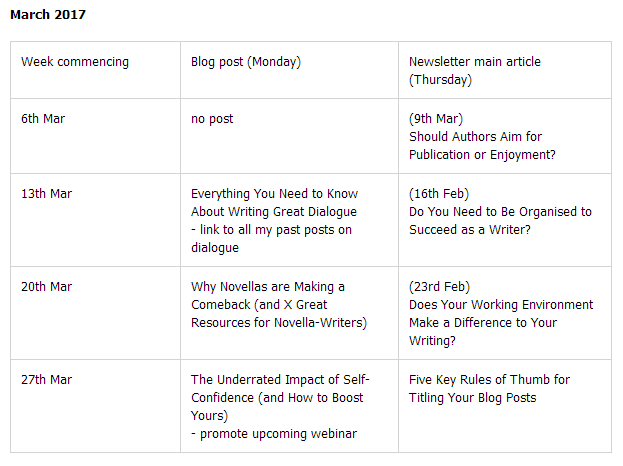
This doesn’t need to be anything fancy or complicated. I make a simple calendar in Evernote each month, with one blog post title and one newsletter piece listed for each week:
You can take this a step further and “theme” the different posts that you do. For instance, if you write one post a week, your standard calendar template might look like this:
- Week 1 – “how to” post
- Week 2 – re-run an old post (see tip #4)
- Week 3 – inspiring, encouraging post
- Week 4 – round-up post, linking to good posts elsewhere during the past month
Alternatively, you might make a calendar that rotates around different topics. For instance, if (like me) you blog about writing, you might have a calendar like this:
- Week 1 – fiction-writing
- Week 2 – freelancing
- Week 3 – blogging
- Week 4 – publishing
There are plenty of different ways to use and structure your calendar, and Darren covers lots of good suggestions in this podcast on creating an editorial calendar.
Step #4: Have a Consistent Post Template
All blog posts have a structure. At the very least, posts start with some sort of introduction – even if it’s just a sentence or two – then have a main body of content. Ideally, they should have a conclusion too.
Bloggers who produce a lot of content generally have at least one standard post structure to work from. Michael Hyatt has a very specific template that he uses for pretty much every post on his blog, for instance.
You might think that using a template will make your posts less interesting. In fact, the opposite is true. It’s easier for readers to engage when your post has a logical progressing (instead of being a meandering collection of points) – and it’s generally far easier for you to share your thoughts if you have a structure to contain them.
Step #5: Recycle Old Posts
If you’ve been blogging for any length of time, you’ll have an awful lot of posts that new readers won’t easily spot. Even if these are listed in your archives, they won’t necessarily be seen.
One very easy way to post regular content when you’re busy is to revive an old post. Simply choose one from your archives (I’d suggest going back to at least a year ago), and repost it.
Depending on your topic and how old your post is, you may want to:
- Update the post with new information or facts, if those have become outdated.
- Update the post with fresh examples and links – these can date quite quickly, so do check all existing links in particular to make sure they still work.
- Change the formatting or layout of the post – perhaps you’ve altered your blog’s theme and the post no longer looks as good as it once did.
- Include a note to state that the post was previously published. I like to do this to avoid confusing readers! I usually pop a line in italics at the top of the post, e.g.: This post was first published in 2012 and updated in 2017.
I’ve republished several of my favourite old posts, and so far, not a single reader has complained … and several have thanked me for publishing content that was just what they needed, right now! So even if you’re reluctant to republish content, give it a go and see what happens.
Of course, there’ll probably be a fair amount of old content that you decide not to republish. You could still save time by using it in other ways – ZenOptimise has a handy list of 12 different ways to do this.
Step #6: Look at Your Whole Weekly Schedule
If you’ve tried the above tips and you’re still struggling to find enough time for your blog, then you need to take a look at everything else going on in your life.
Chances are, there are a lot of things you can’t realistically change (e.g. the hours you spend at your day job, the hours your partner works, how long your baby naps) but there probably is at least a little bit of leeway. For instance:
- Can you set aside one or two nights a week for an hour’s blogging, e.g. from 8pm – 9pm? You don’t have to work all evening every evening!
- Can you get up 15 minutes early to blog in small increments? (Check out Tip #2 on batch producing posts, above.)
- Could you reduce the time you spend on some household chores? For instance, could you batch cook a couple of nights a week so you don’t have to cook each night? Can you order groceries online so you don’t need to get out to the shops at the weekend?
- If you live with a partner, can you arrange your joint schedule so that you both get a little more free time? For instance, perhaps you’ll take the kids out on Saturday afternoons and they will have the kids on Sunday afternoons: that way, you’ll have time to blog and your partner will have time for their hobbies.
- If you don’t know where your time is going, keep a time log for a week to find out and write down everything you do. If you’re mostly at your computer, use RescueTime to track what you’re spending time on.
There may well not be any easy answers, and you may be frustrated that a lot of your schedule can’t be changed. Focus on what you can change and control, though.
Moving Forward, Step by Step
Blogging can feel a bit relentless at times: your blog needs fresh content week after week. Treat it as a marathon, not a sprint – don’t burn out.
Also (and I really struggle with this!), do try not to compare yourself to other bloggers. They may well be at a completely different stage of life from you (perhaps they don’t have a day job, or they don’t have kids, or they can afford to pay a team of assistants…). Instead of thinking about them, stay focused on what you can do to keep growing your blog – or, as Charlie Gilkey puts it, watch your own lane.
Ideally, you want to gradually move towards a position where you do have more time for your blog – so you might look at creating or growing some income streams, for instance, so you can afford to pay for some childcare or for a virtual assistant.
I know how tough (practically and emotionally) it can be to keep up with blogging when you don’t have much time to spare. Take it at your own pace, step by step. And while overall consistency is important, if you do feel overwhelmed, it’s fine to take an occasional week off!
How do you fit your blogging in around your busy life? Does one of the above tips already work well for you, or do you have something else to suggest? Share your ideas in the comments below!
The post How Do You Blog Consistently When You Have Very Little Time? appeared first on ProBlogger.