How to Convert HEIC Images to JPG Format?
Want to convert HEIC to JPG? If that’s the case, then you have come to the right place.
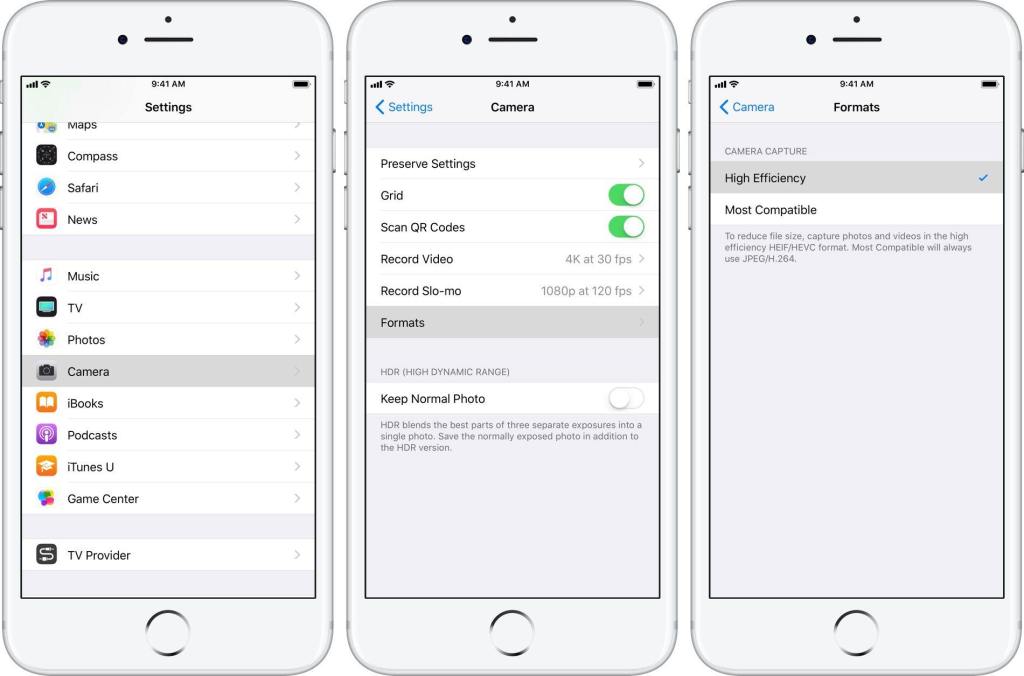
Before the iOS 11 update came out, the Apple devices were using standard JPEG format for their camera images, but when the iOS 11 released the JPEG format was changed to the HEIC. But these files are pretty much limited and supported only to Apple devices such as Mac, iPhone, iPad and more. What if you want to use HEIC on Windows PC or other devices? In order to use Apple iPhone camera photos in other devices, you should convert them to JPG format, as the JPG format can be supported on any device. In this article, you will learn how to change Apple HEIC images to JPG.
What is the HEIC?
HEIC stands for “High-Efficiency Image Format,” which is a dominant image type. You might be thinking that it should be HEIF, and yes that should be the case if you only look at those terms, but Apple decided to change the F character with the C. We don’t know what the reason behind it was, but that’s the truth. This image format is excellent from a security point of view. Apple also has changed the format for the recorded videos to HEVC, which stands for High-Efficiency Video Codec.
Do you know that HEIC only consumes 50 percent of storage space while compared to JPG? It means that you can store twice as many HEIC images in the same storage space. Surprisingly, the image quality remains the same in both formats.
How to Convert HEIC to JPG on PC?
Converting HEIC photos to JPG on a PC is pretty simple. Here’ how to do that with multiple methods:
Method 1: Setting Up the Automatic Transfer on iOS device
As discussed above, HEIC is not going to support Windows and other devices. We are going to tweak some settings of image transfer on your iPhone and iPad. Apple has provided a fast and straightforward way to export images to a PC by just enabling a setting on your iOS device while transferring images to a computer. Let’s see how to set up and use this setting to convert our HEIC to JPG images:
- Head to the Settings on your iPhone or iPad.
- Then head to the Photos option in the Settings.
- Scroll downwards and find the “Transfer to Mac or PC” option.
- Now select the Automatic option located inside the “Transfer to Mac or PC” section.
- Once that is done, go back to the Home screen and close all tabs.
Now, whenever transferring photos to a PC, make sure that this option is enabled so that you can use your iPhone photos on Windows.
Method 2: Converting HEIC to JPG Using Sharing Feature
If you only need a few images in JPG format, then one of the best ways to do so is by sharing the photos through an email. You can also upload several images to your Google Drive. In both methods, your pictures will be automatically converted to JPG format. Here’s how you can do that:
- Head to the photos which you want to share.
- Now make a selection of the photos that you want to convert into JPG format.
- Once that was done, simply hit the Share button.
- Now choose the Mail or Drive option. Choose whichever you think is best for your requirements.
- Once the photos are shared and uploaded to the internet, you can use them in whichever device you want, such as on your computer, android phone and more.
This is how to change HEIC to JPG using the sharing options.
Method 3: Changing HEIC to JPG Format Using an Online Converter
There some online HEIC to JPG format available is good enough to convert multiple images at once. Moreover, most of these tools are free. There is an online image conversion tool called “HEICtoJPEG” which is capable of converting 50 images in a single stretch. You can simply drop 50 HEIC photos there, and after the conversion, you can download all the photos one by one. There is no button to download all images in a single click. Here’s how to convert HEIC to JPG using the HEICtoJPEG online image converter:
- Head to the https://www.heictojpg.com/ link in your iOS device.
- Now click on the Drop icon to drop up to 50 images.
- Start the conversion, and after that, you will have to download each photo.
Method 4: HEIC Converter Free- Convert HEIC in One-Click
There is a free tool for iPhone devices to convert the iPhone photos into a standard image format. The export photos will have their original quality and the software won’t play with the resolutions, giving you the exact image in JPG format. If you want to decrease the quality and size, then there is an option for that which allows you to compress the picture according to percentage.
iMazing HEIC Converter
If you want to convert HEIC images to PNG, then there is a program for doing the same thing. The tool’s name is “iMazing HEIC Converter” which can convert HEIC to PNG as well as JPG format. This program is entirely ad-free and has surprising accessible controls. The tool is pretty much straightforward, and does its work well without messing up. There is a drag and drop control for an easily accessible menu. You can select an entire folder of HEIC images to convert them in a single click.
How to Convert HEIC to JPG on Mac?
The method for converting HEIC to JPG on Mac is not much different. You can use Method 1 and Method 2 for converting photos. Just enable the Automatic Transfer on your iPhone and transfer the images to your Mac and all the pictures will be automatically converted to the JPG format.
Maria Davis is a self-professed security expert; he has been making the people aware of the security threats. His passion is to write about Cyber security, cryptography, malware, social engineering, internet and new media. He writes for Norton security products at norton.com/setup.
Source: http://au-norton.com/how-to-convert-heic-images-to-jpg-format/