How to Fix ATKEX_cmd.exe Has Stopped Working
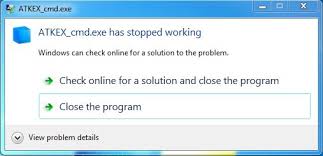
Many users are reporting that they are continuously getting the ATKEX_cmd.exe has stopped working error on their computer. Other users are complaining that they are facing this error while trying the demand app, such as rendering a video or playing any game. If you are one of them, then follow the instructions mentioned below to fix this issue.
Here’s how to fix ATKEX_cmd.exe has stopped working
-
Install the Intel Management Engine Driver
-
You need to start downloading the IME updated version by pressing on the Install and Setup option.
-
After that, by going to the Drivers and Download column, press on the Intel Management Engine Driver for Windows 8.1 and Windows 10.
-
Press on the download option.
-
It is located in the upper left-hand column of the display.
-
After completing the downloading process, remove the zip archive.
-
Press on the executable installation file.
-
Go through the instructions to finish the IME installation file.
-
Start the system again.
-
Check whether the ATKEX_cmd.exe has stopped working issue is fixed or not.
-
Make sure that the audio driver is turned on
-
Click on the Windows and R keys together.
-
It will launch the Run prompt box.
-
Enter the “devmgmt.msc” in the search bar.
-
Click on the Enter option.
-
It will launch the Device Manager option.
-
After going in the Device Manager option, you need to enlarge the pull-down list registered with the Audio inputs and outputs option.
-
After that, you need to right-click on the audio driver.
-
Select the Enable Device option.
-
It is located on the prompt box.
-
You need to right-click on an audio driver once again.
-
Select the Uninstall device option.
-
After that, press on the Uninstall again to verify the uninstallation procedure.
-
After completing the procedure, start the system again to permit Windows for installing the audio driver.
-
Uninstall the Realtek audio drivers
-
Click on the Windows and R keys together.
-
It will launch the Run prompt box.
-
Enter “appwiz.cpl” in the search bar.
-
After that, click on the Enter option.
-
It will launch the Programs and Features display.
-
After going in the Programs and Features menu, go down to the menu list of all the apps which you have already installed.
-
Find the Realtek HD Manager option.
-
After getting the driver, you need to right-click on the driver.
-
After that, go through the instructions to finish the Realtek driver audio uninstallation procedure.
-
Start the system.
Source :- https://karenmintonblogexpert.wordpress.com/2019/08/27/how-to-fix-atkex_cmd-exe-has-stopped-working/
Kellie Minton is an avid technical blogger, a magazine contributor, a publisher of guides at mcafee.com/activate and a professional cyber security analyst. Through her writing, she aims to educate people about the dangers and threats lurking in the digital world .