How to Setup Multiple Opt-In Freebies With Mailchimp
Adding an opt-in incentive to your website and social accounts can make a massive impact on your email list growth and customer engagement.
Up until recently MailChimp made it difficult to do this well, but now that’s all changed.
Though we love tools like ConvertKit for more advanced blogging and online business, it’s hard to beat MailChimp’s free account for new projects.
In this post I’ll teach you exactly how to do it not just for one opt-in incentive, but for as many as you’d like.
“Step by step instructions to setup multiple opt-in freebies on your website using MailChimp”
Tweet This
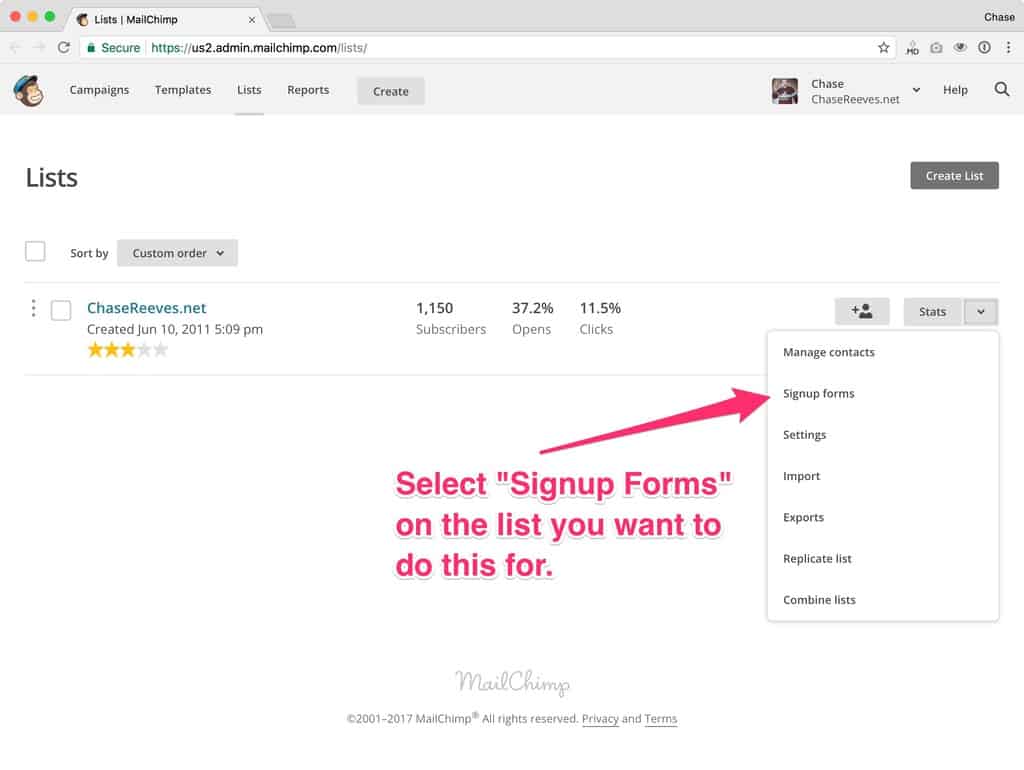
1. Create a new hidden field in your MailChimp signup form:
1.1 Select Signup Forms on the list you want to do this for.
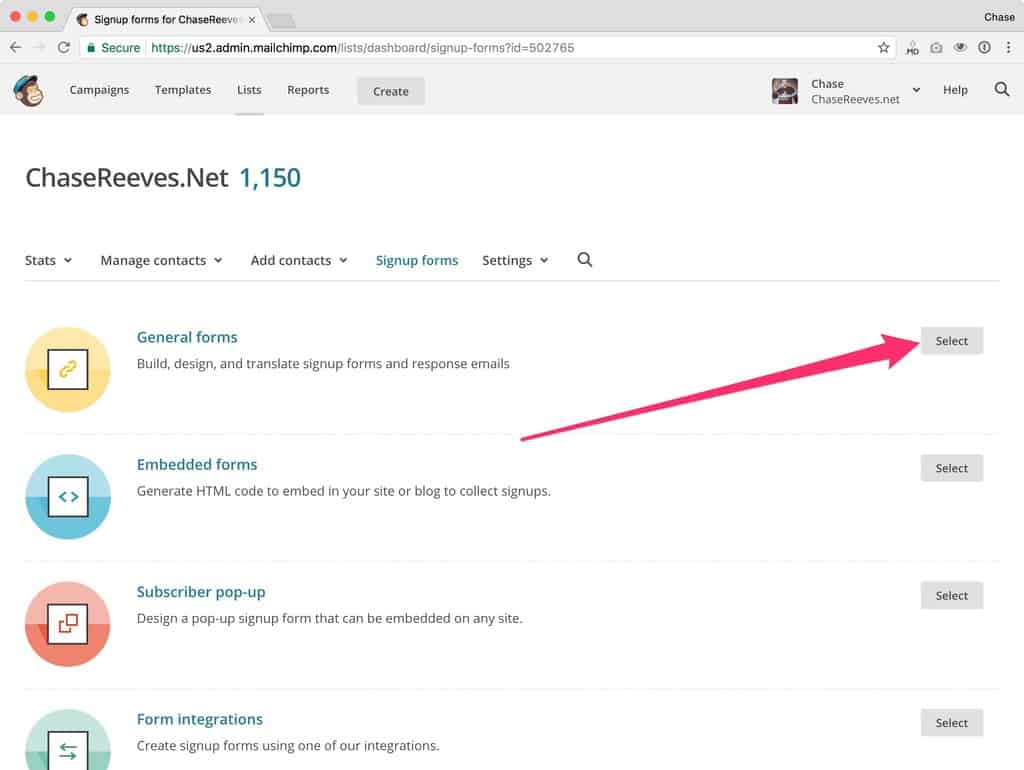
1.2 Select “General Forms”
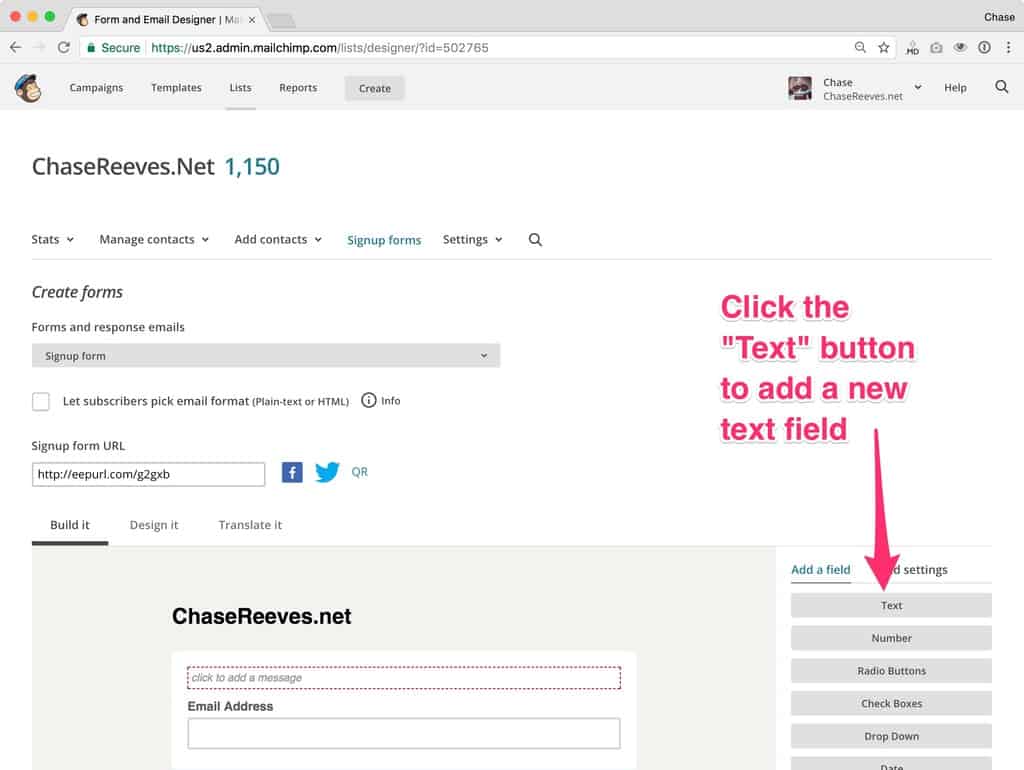
1.3 Click to add a new Text field
1.4 Name the new text field and make it hidden
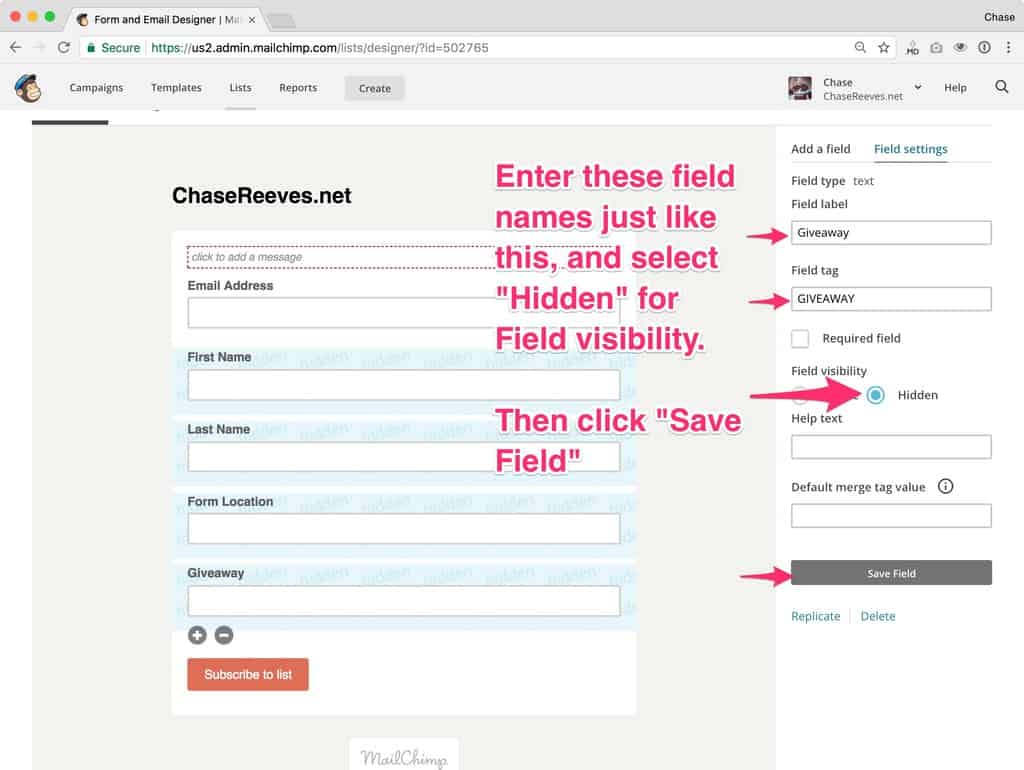
Note: it’s important you remember what you name this field. I recommend give it a name with only one word like “GIVEAWAY.”
2. Create a new automation to deliver your freebie
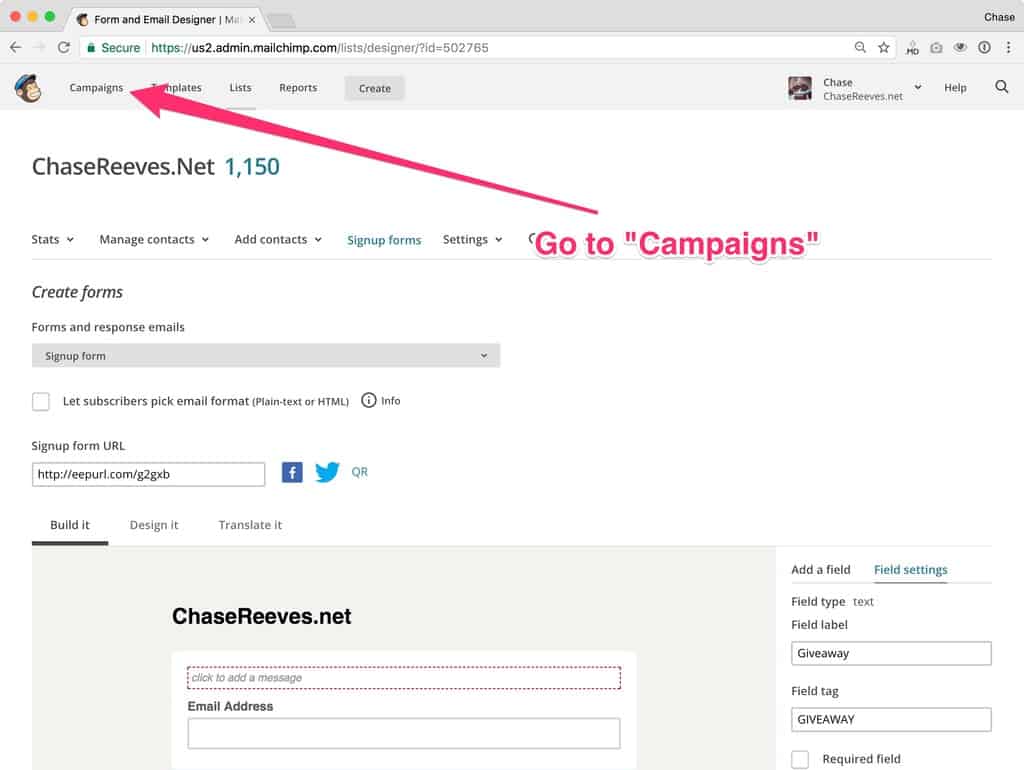
2.1 Go to “Campaigns”
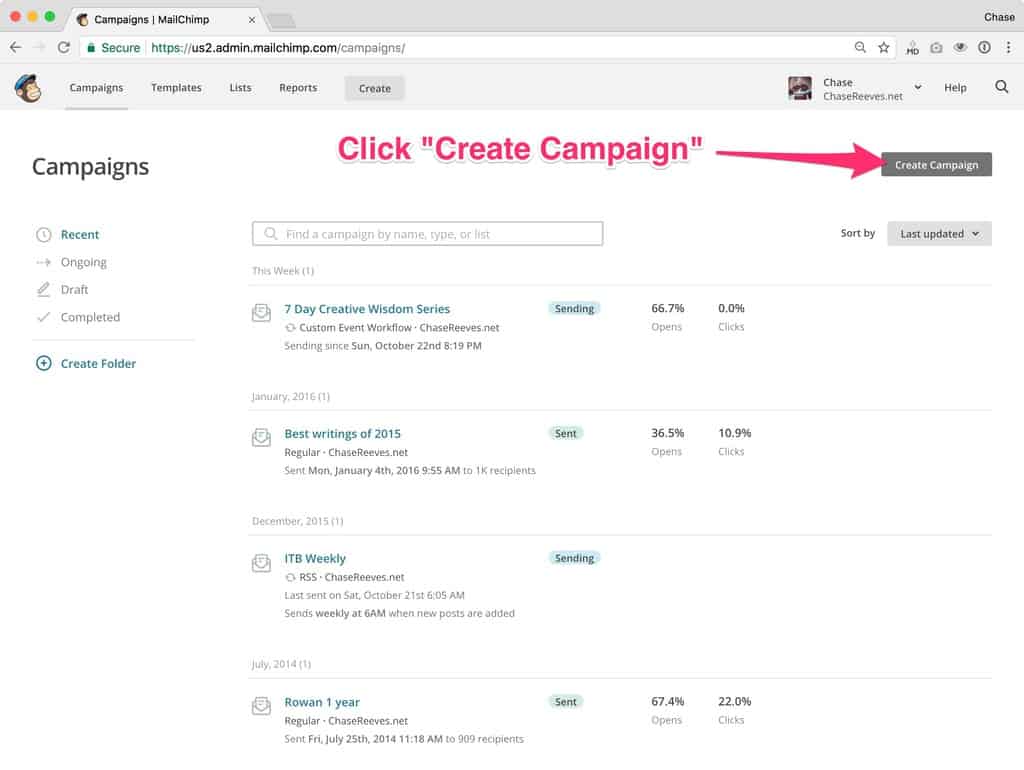
2.2 Click “Create Campaign”
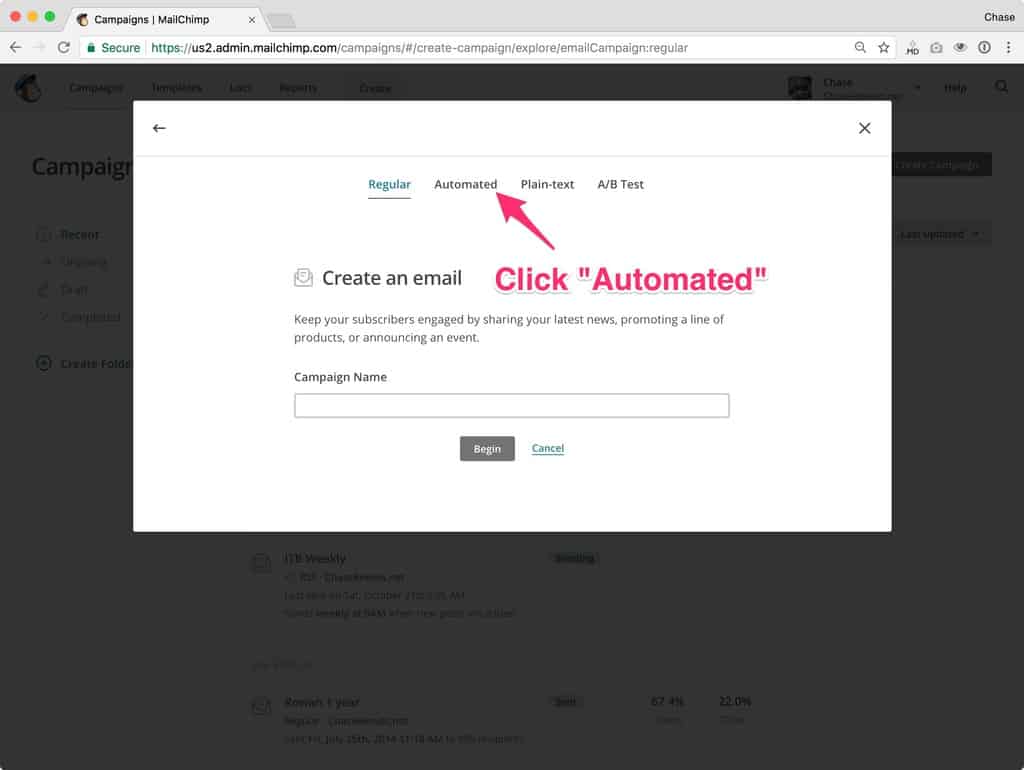
2.3 Choose to create an “Automated” Campaign
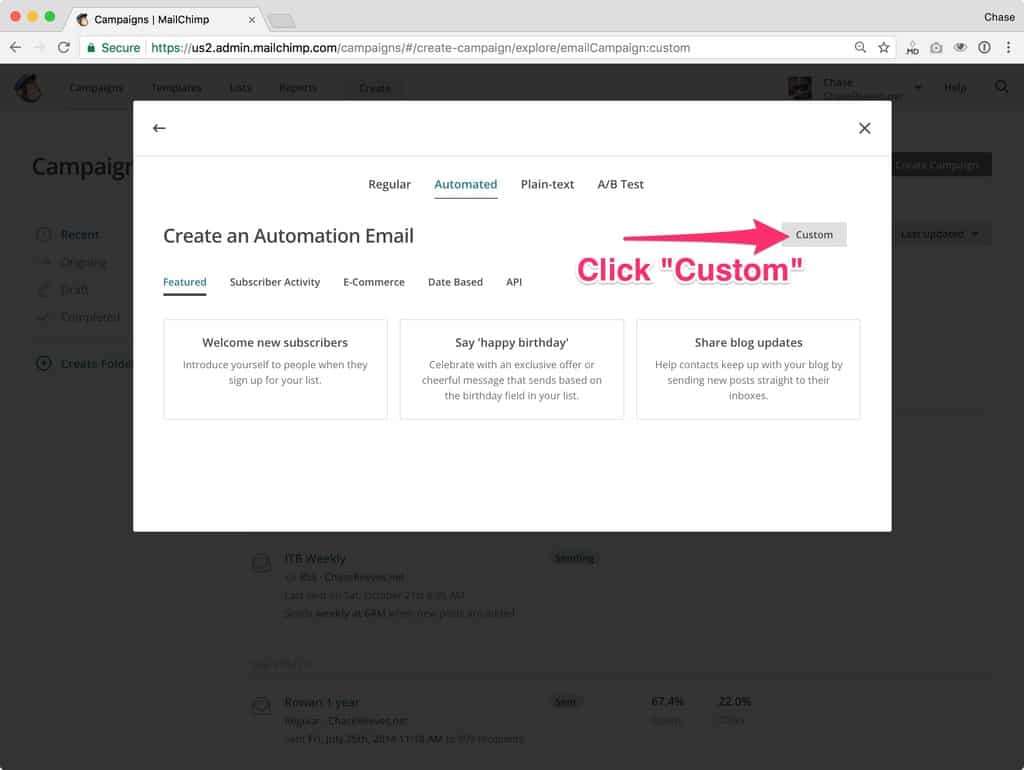
2.4 Choose to create a “Custom” automated campaign
2.5 Give your opt-in freebie a name and choose your list
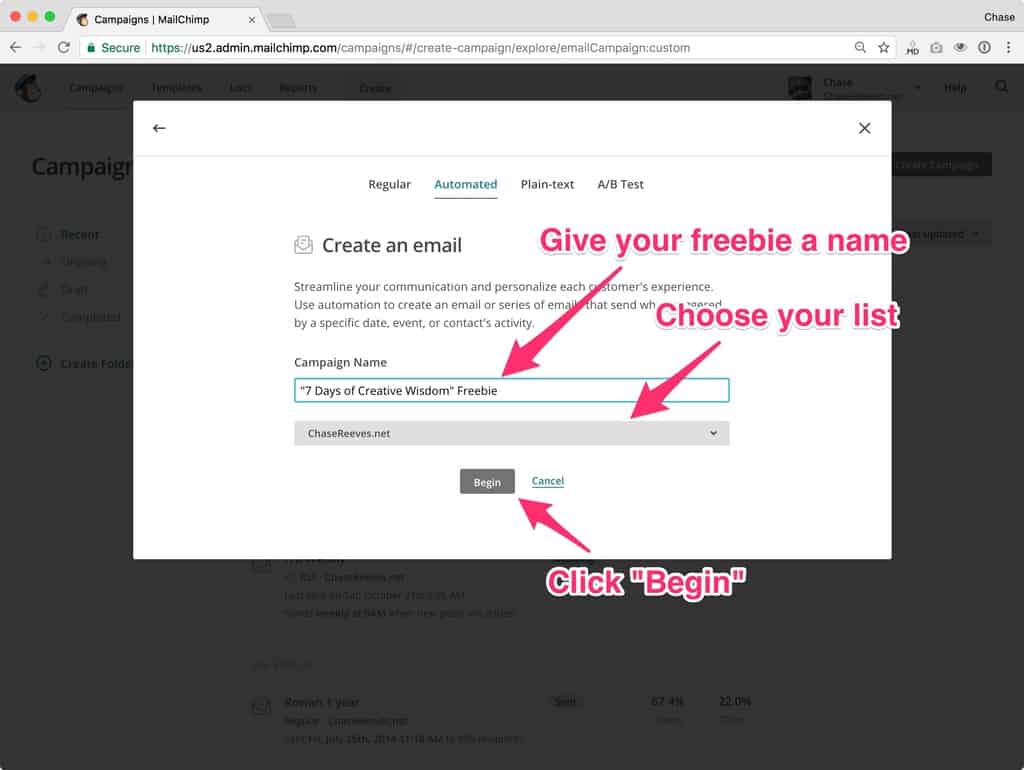
2.6 Click to edit what event will “Trigger” this automation

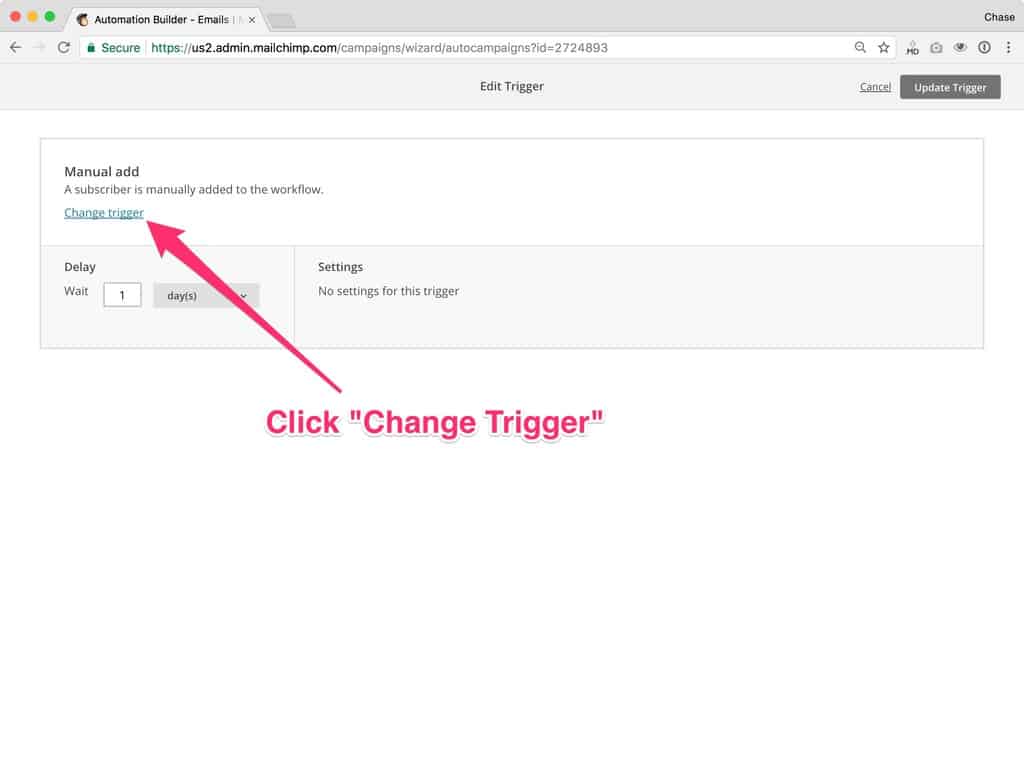
2.7 Click “Change Trigger”
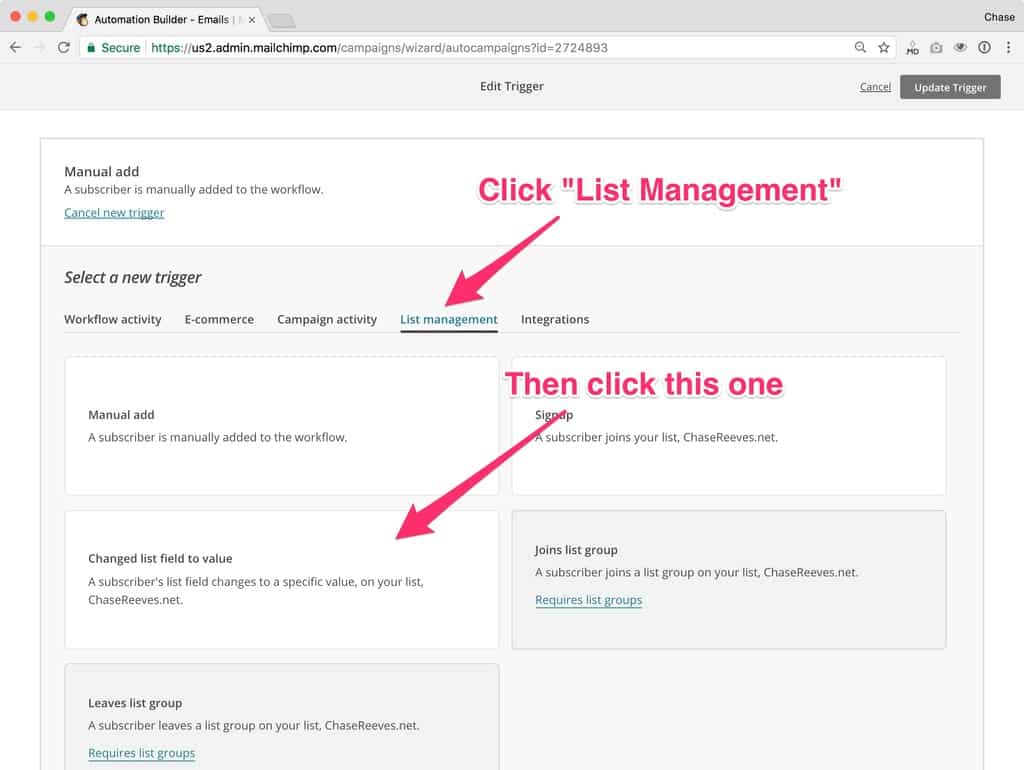
2.8 Choose “Changed list field to value”
2.9 Set the trigger delay and field settings
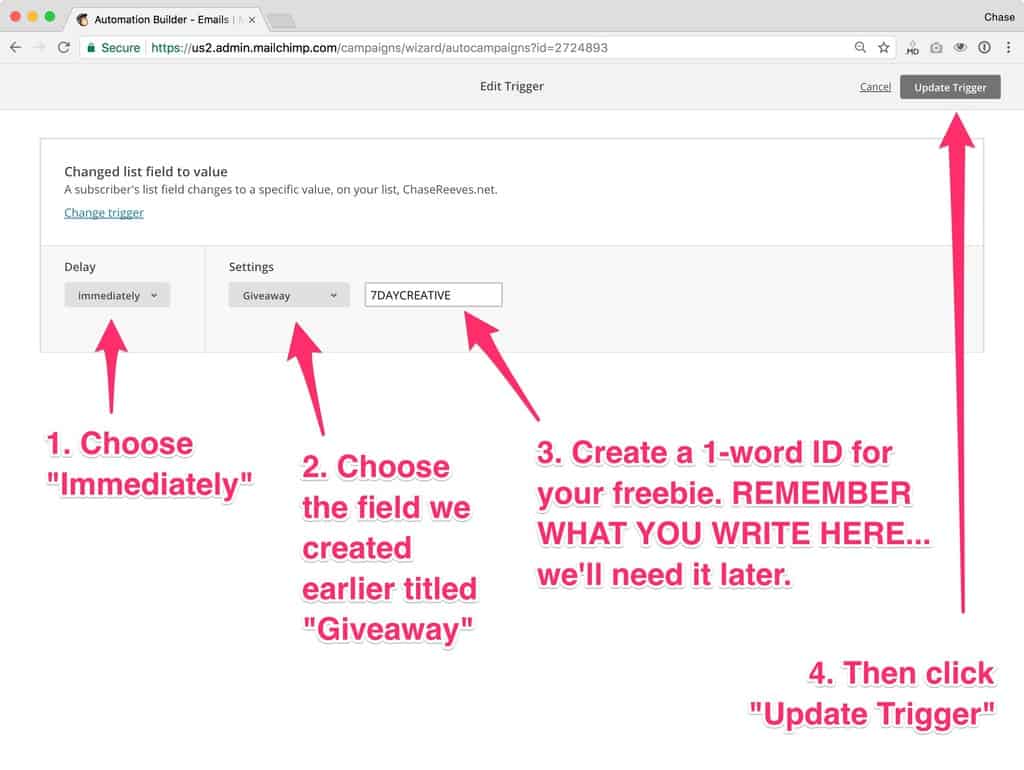
Note: it’s important you remember what you name this field. I recommend you give it a one-word title/ID like the one I use in the example. BUT make sure that it describes the freebie. If, for example, it’s a PDF shopping list for a week of plant-based meals, a good ID might be “PLANTSHOPLIST” or something like that.
2.10 Design and add the content for the email that will deliver the freebie
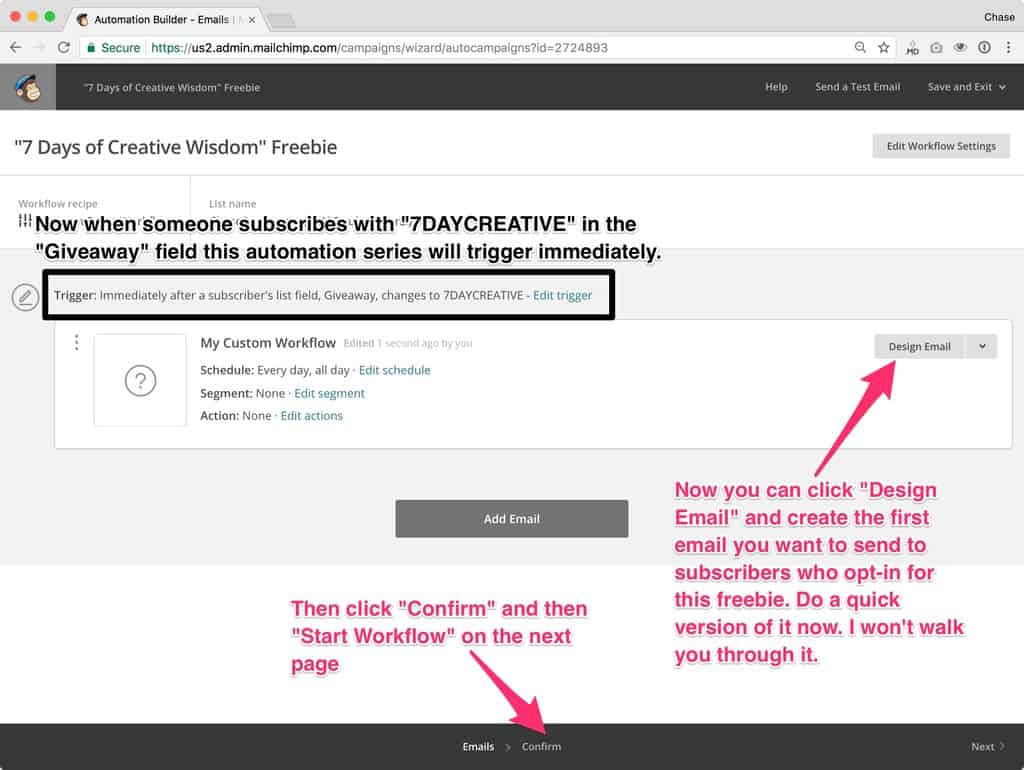
Note: I don’t walk you through the details of how to create this email yourself, but if you’ve used MailChimp before it will look familiar to you.
2.11 Optional: repeat steps 2.1 – 2.10 to create a second opt-in freebie automation sequence
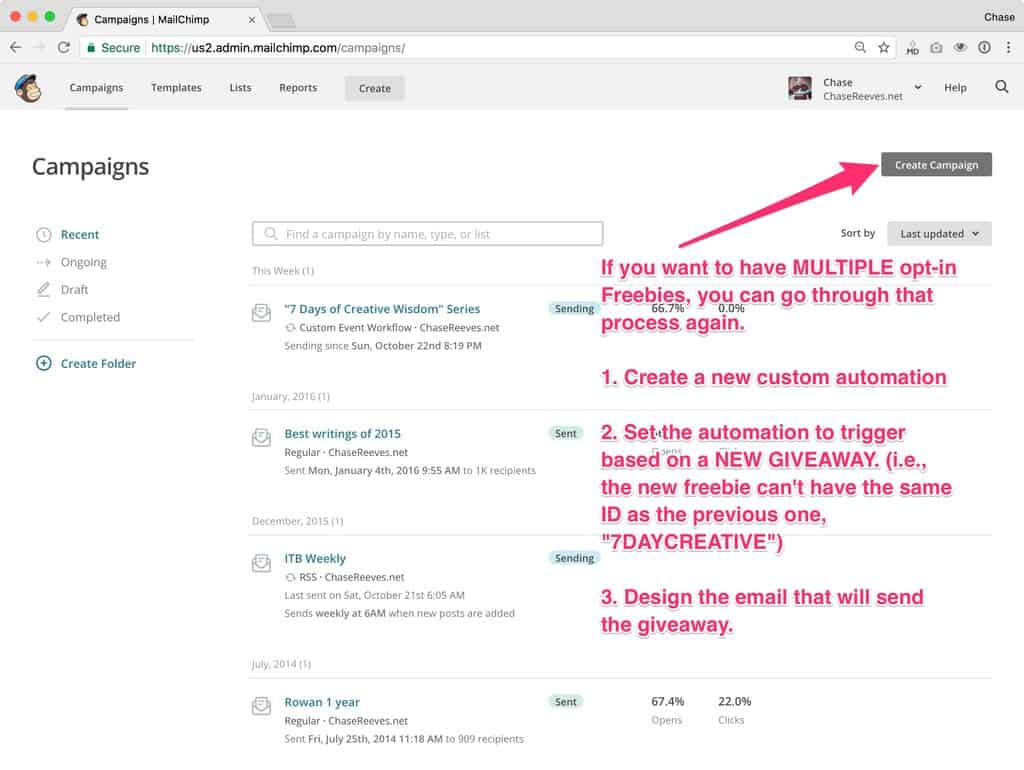
Note: each automation sequence needs to trigger from a UNIQUE freebie ID. So, for example, if your first freebie was “PLANTSHOPLIST”, your next freebie would need to be different from that one.
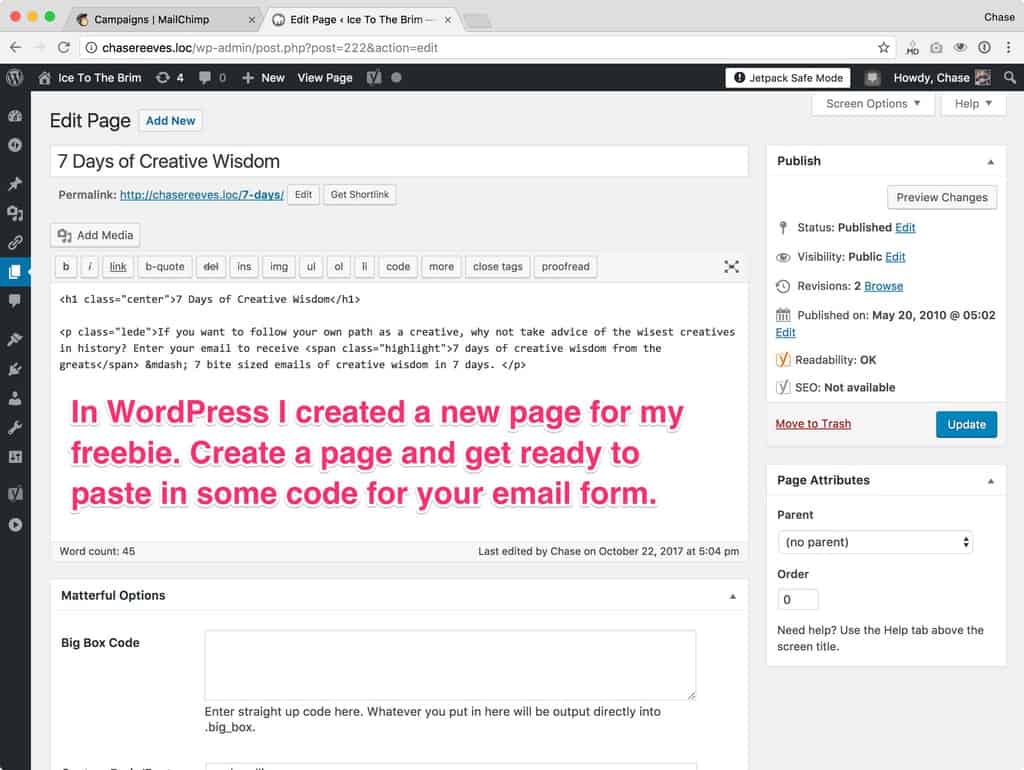
3. Create a landing page for your freebie + add your mailchimp form
3.1 Create a new page on your website to be the landing page for one of your opt-in freebies
3.2 In MailChimp, go to Lists > Signup forms

3.3 Click on “Embedded Forms”
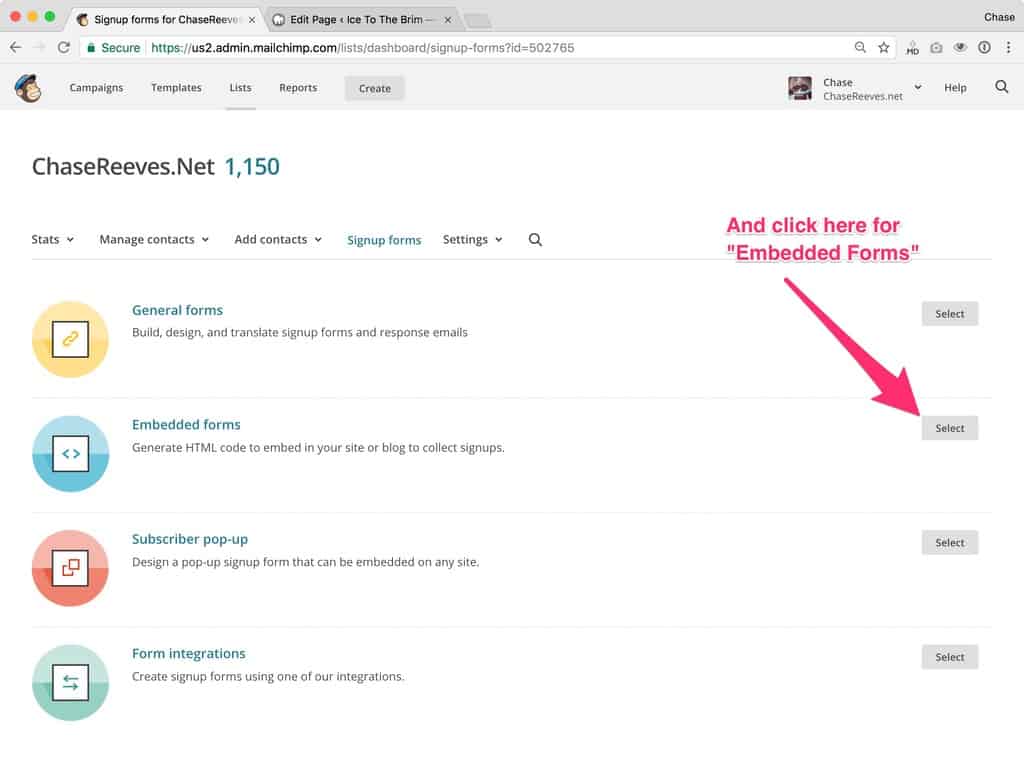
3.4 Choose your form settings and then copy the embed code
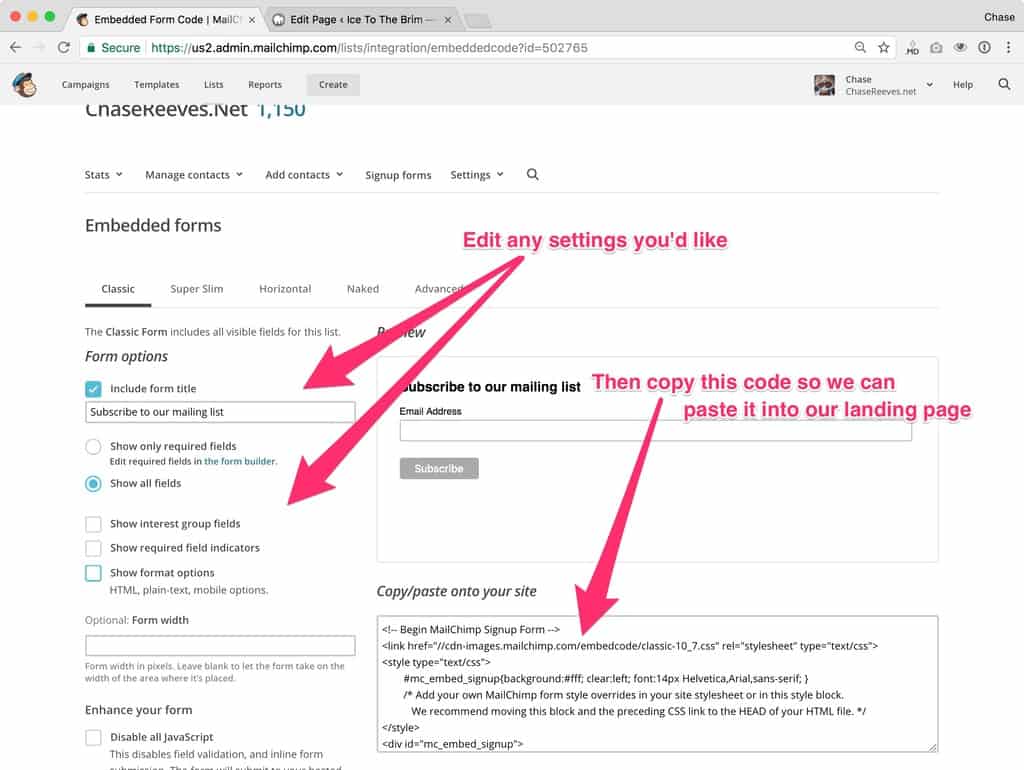
3.5 Paste your embed code into your landing page
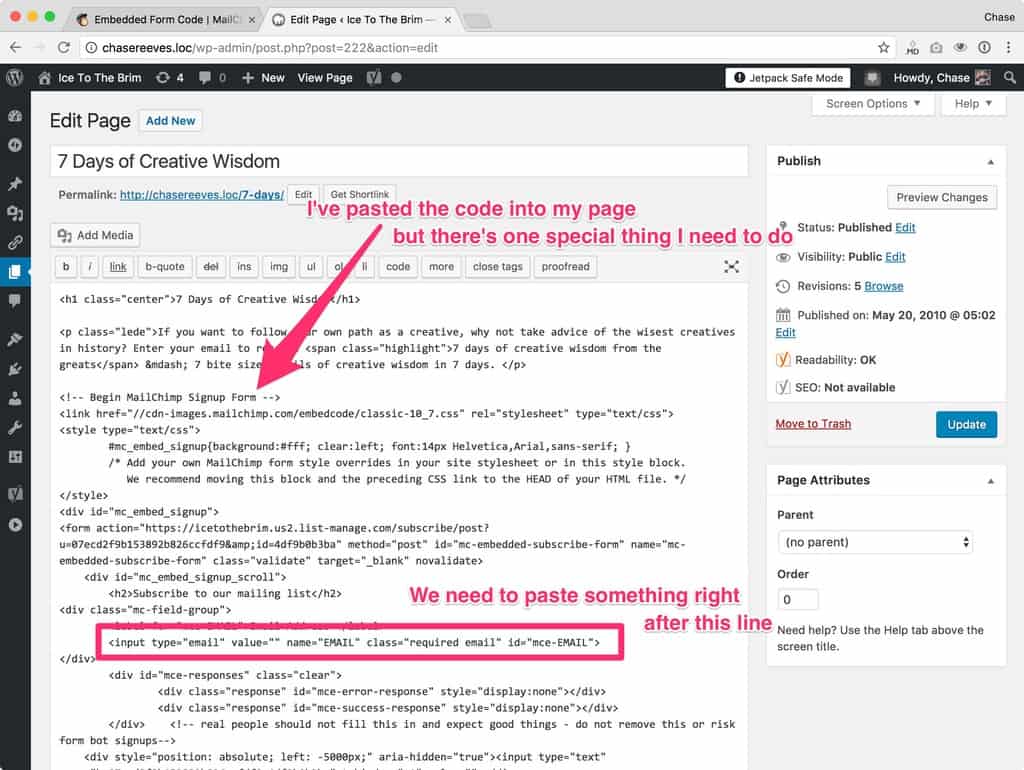
Note: make sure you embed the code the correct way. Here’s how to do it in WordPress, in SquareSpace.
Note: there is one important piece of the embed code we need to look through and find. It starts with input type="email". We’re going to paste something in after that line.
3.6 Copy and paste in this special line of code AND change the value to match your freebie ID
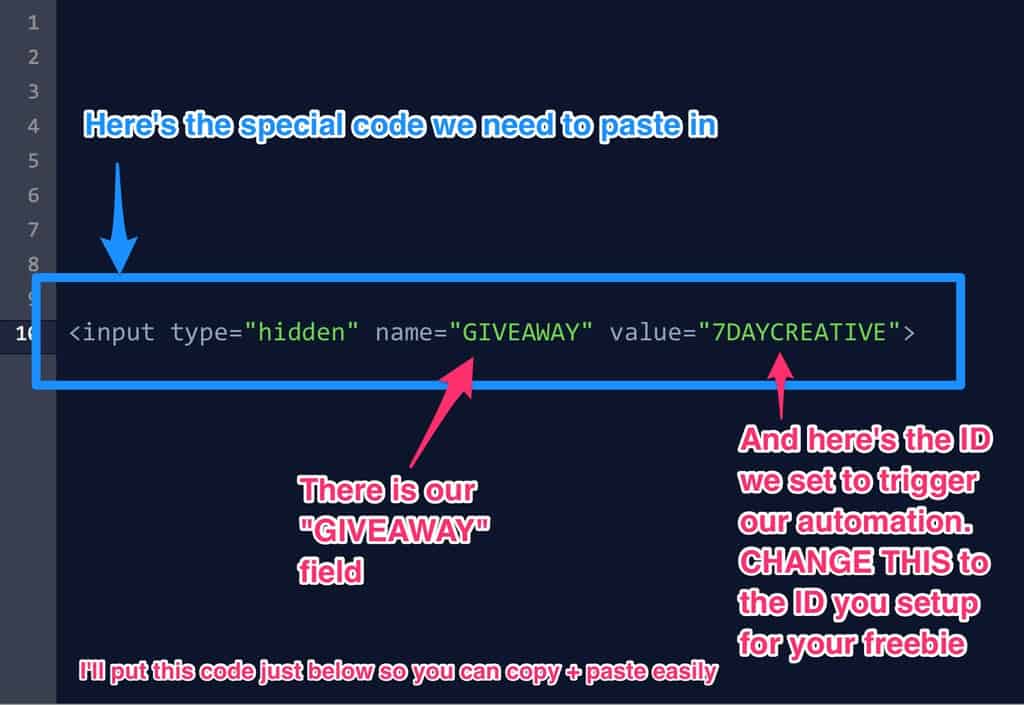
Note: below is the special line of code to copy and paste into the form in the place we identified in step 3.5. YOU WILL NEED TO CHANGE THE VALUE SETTING TO MATCH YOUR FREEBIE ID.
<input type="hidden" name="GIVEAWAY" value="YOUR_FREEBIE_ID">
To continue the example I went with in the notes above, you would change the last part of the code to value="PLANTSHOPLIST"
3.7 Paste that line of code into the correct place on your landing page
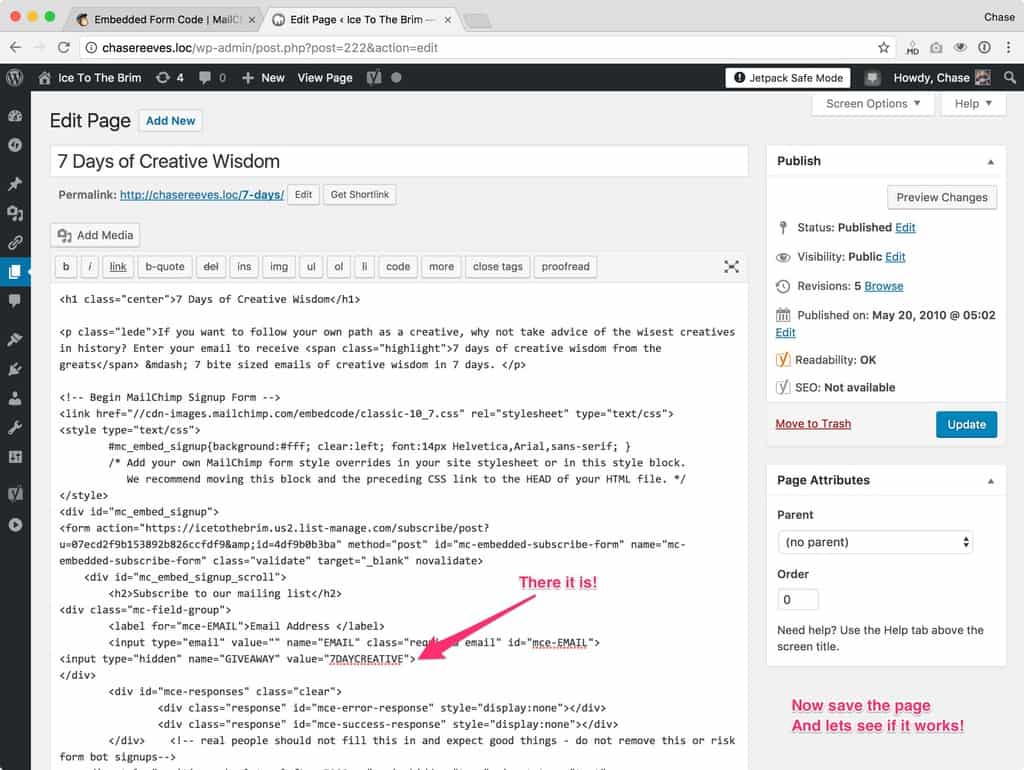
Note: remember, we’re going to place that code just after the line that says input type="email".
4. Test your form
4.1 Test your form
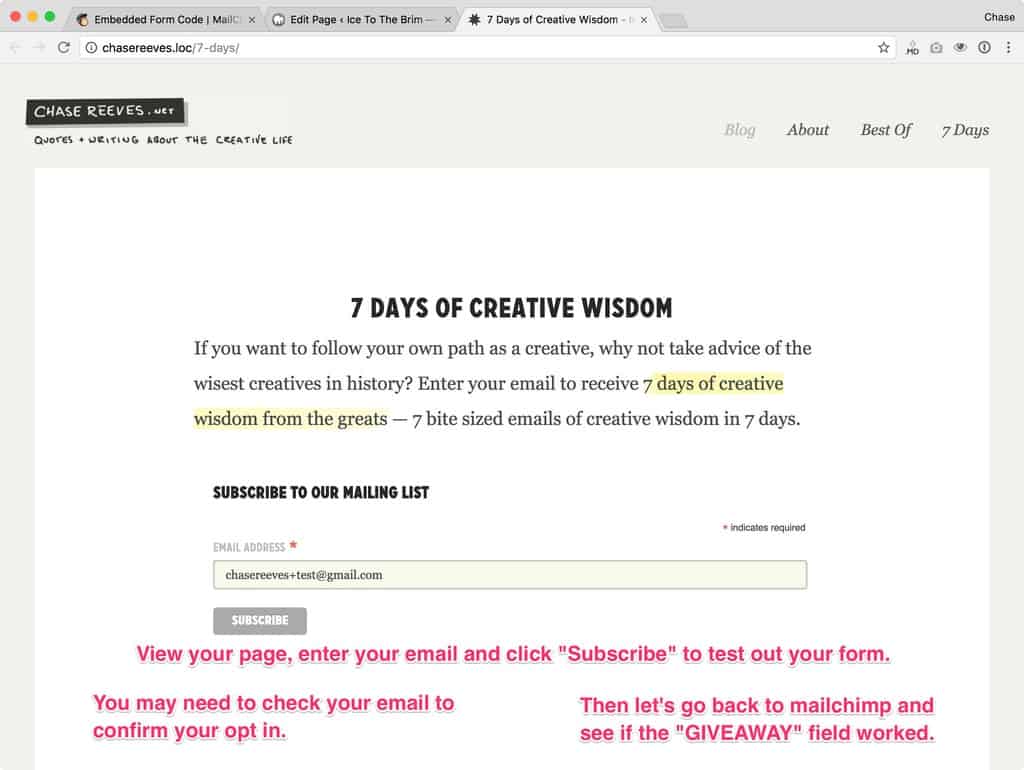
Note: you might need to check your email and “Confirm” your subscription before MailChimp will mark your email as a new subscriber.
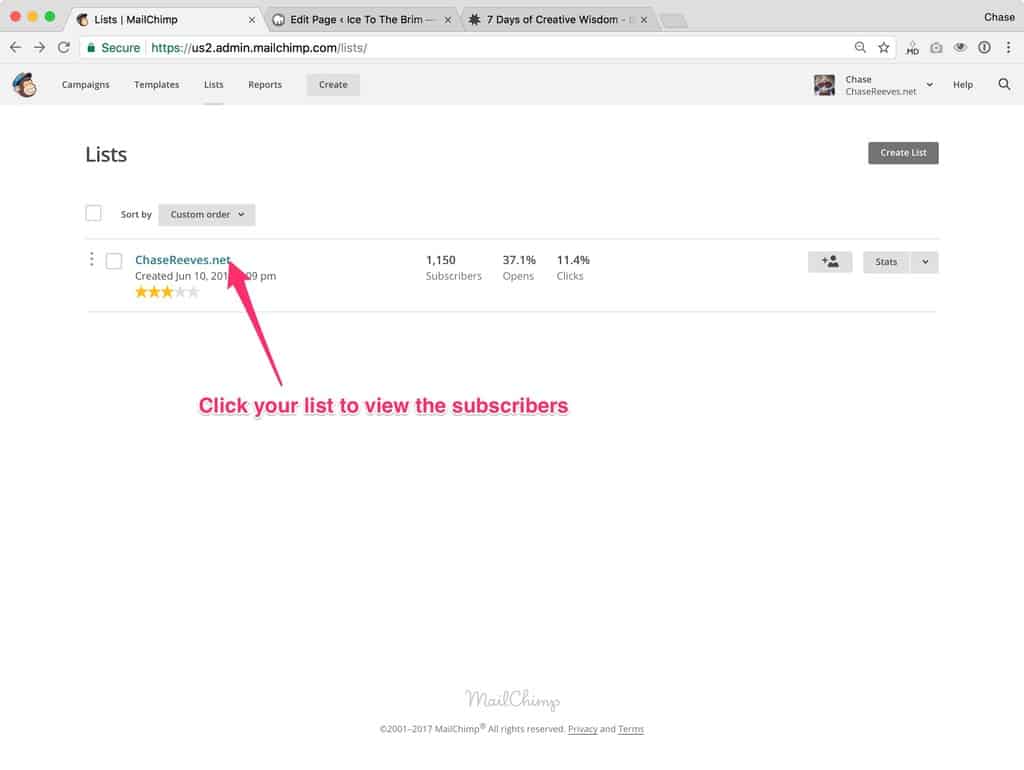
4.2 Go back to MailChimp and click your list to view subscribers
4.3 Find the email address you tested the form with and double check that the correct freebie ID is in the “Giveaway” column
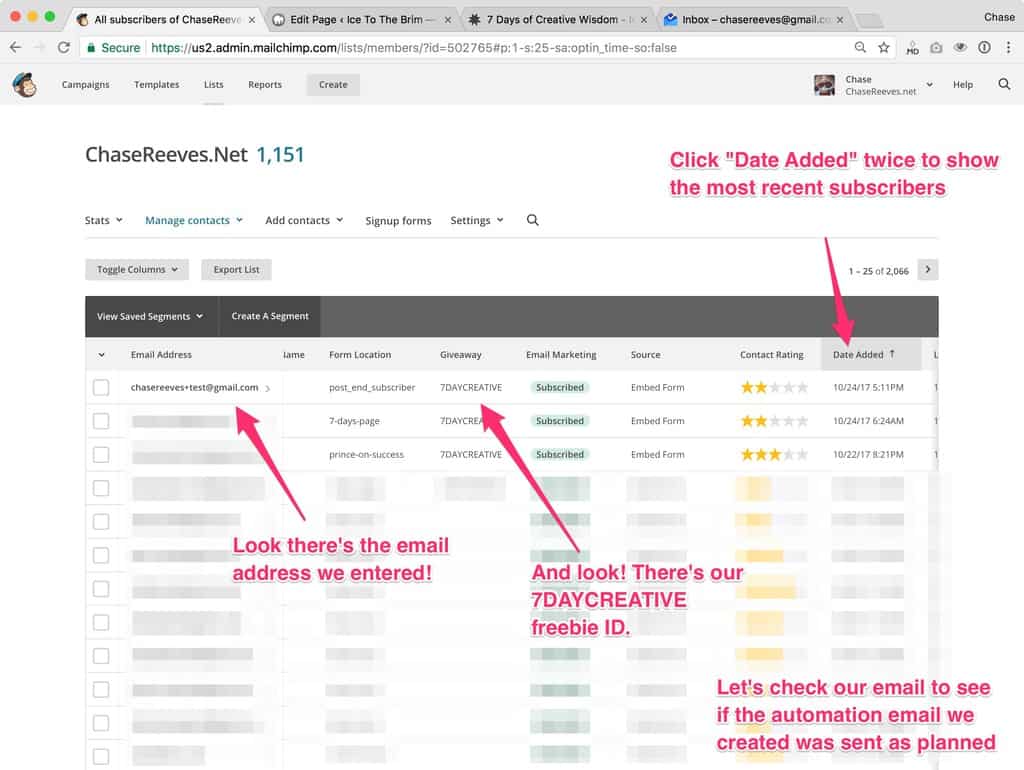
Note: you can search for the email address you added by clicking the magnifying glass.
4.4 Check your email to make sure the automated email was sent
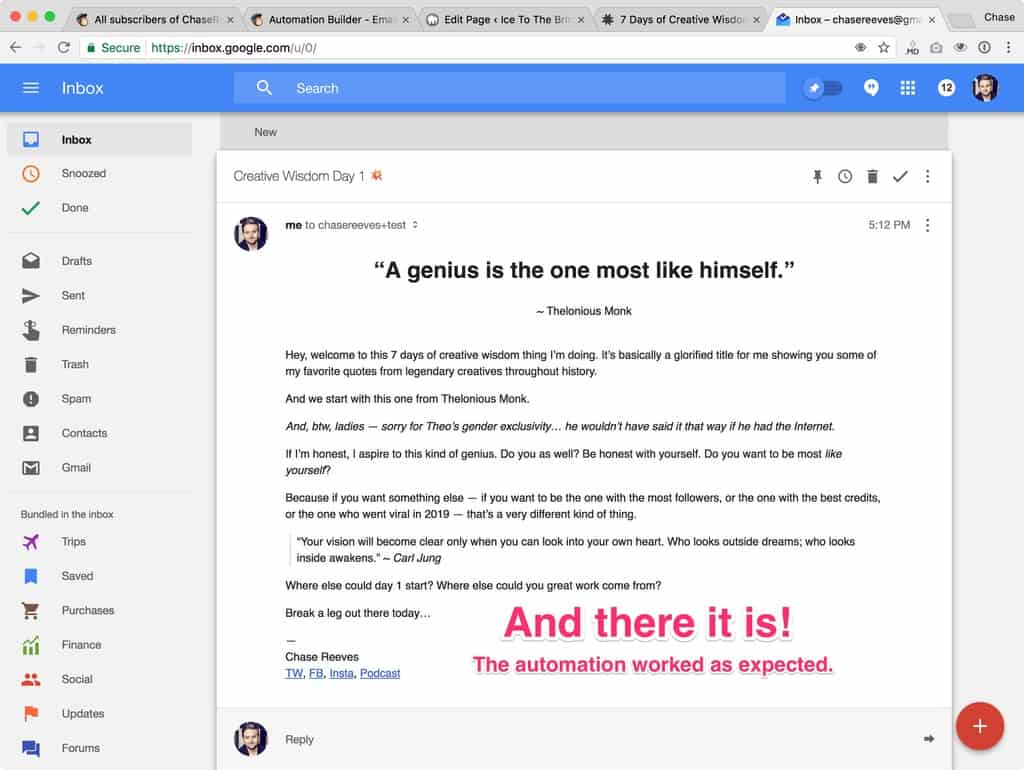
Note: you can also double check the automation you created in step 2.1 if you don’t have the email yet. There you can see if someone is “in the queue.”
4.5 Repeat steps 3.1 – 4.5 for any additional opt-in freebie landing pages you need to setup
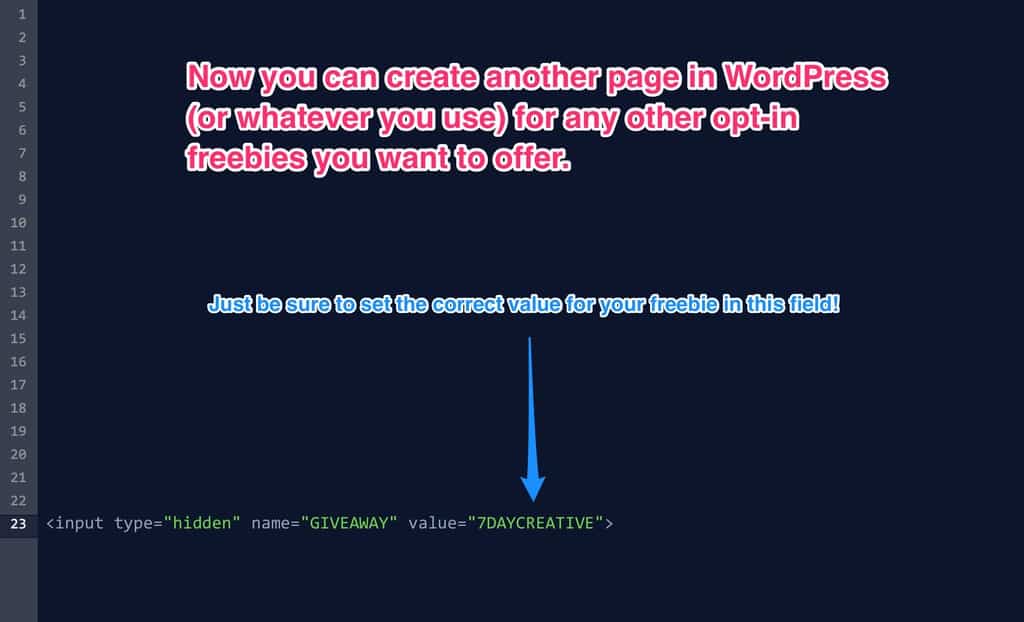
Note: just be sure to set the correct value for the freebie ID in each of the forms.
What to do next
Creating things like this in ConvertKit is a bit easier, and ConvertKit definitely comes with more powerful features for bloggers, but it’s hard to beat MailChimp’s free acount when you’re just starting out.
Now that you have the TOOLS, it’s time to tuneup your STRATEGY for serious email growth. We have free training to help you do it.
Check this graph out:
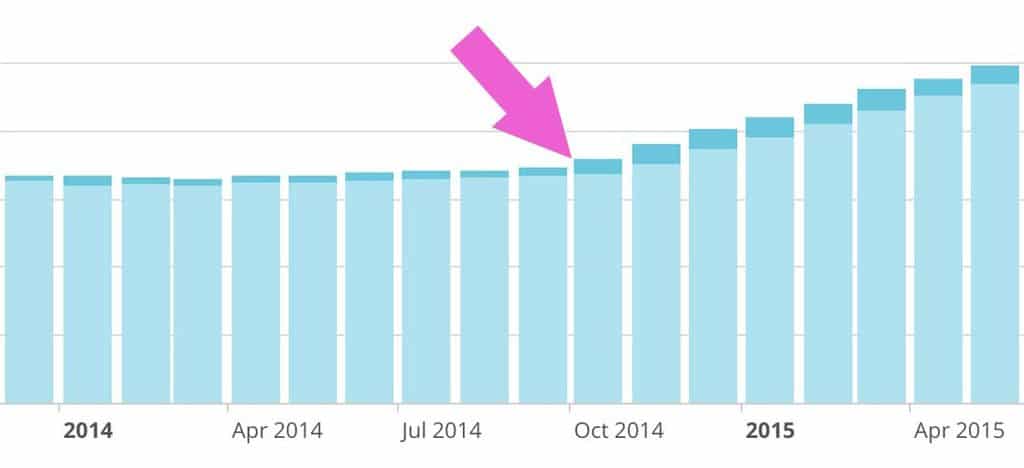
Notice what happens starting in October, 2014: serious, consistent growth.
This is the kind of growth you need to have in your email list, and we’re about to teach you how to do it.
We created a 7-day “grow your email list” challenge. In it we explain to you exactly what happened to us, and how we jump-started our growth. We don’t want you to make the same dumb mistake we made, waiting an entire year to finally do something to grow your list.
This 7-day challenge will guide you, step-by-step. We’ll tell you exactly what to do to get your list growth on track, in one email a day from us for seven days. We’ll show you specifically what you need to do to create an irresistible offer people will jump on. In this challenge we’ll cover the creative, the tech and the marketing.
Ready to grow your list, so you can stop worrying about all the email subscribers you’re missing out on? Sign up for our challenge and we’ll help you get to work.
- You will get value from this email course. Each email is quick and actionable so you can work on things that actually matter to your business.
- You won’t just get marketed to. We write actionable, focused content every week that will apply to your business without purchasing anything.
- You really will be able to grow your email list. Most people don’t know what makes visitors become subscribers. If you’re getting any traction on your site or social media channels this process will absolutely help you create an offer that grows your email list.
Enter your email address in this box below to start the challenge:
Don’t miss out on more email subscribers. Let us guide you to consistent, healthy email list growth in 7 days.